本文介绍了如何在chrome下用webrtc来实现桌面共。因为必要要用https来访问才行,因此也顺带介绍了如何使用SSL证书。
https://github.com/otalk/getScreenMedia/tree/master/chrome-extension-sample
或 http://yunpan.cn/cHfwnrZcG2hsH 访问密码 1cf9
- 打开 manifest.json 文件,修改下面的内容:
"content_scripts": [ {
"js": [ "content.js" ],
"matches": [ "https://16.157.135.85:*/*" ]
}],
"externally_connectable": {
"matches": [
"https://16.157.135.85/*"
]
}
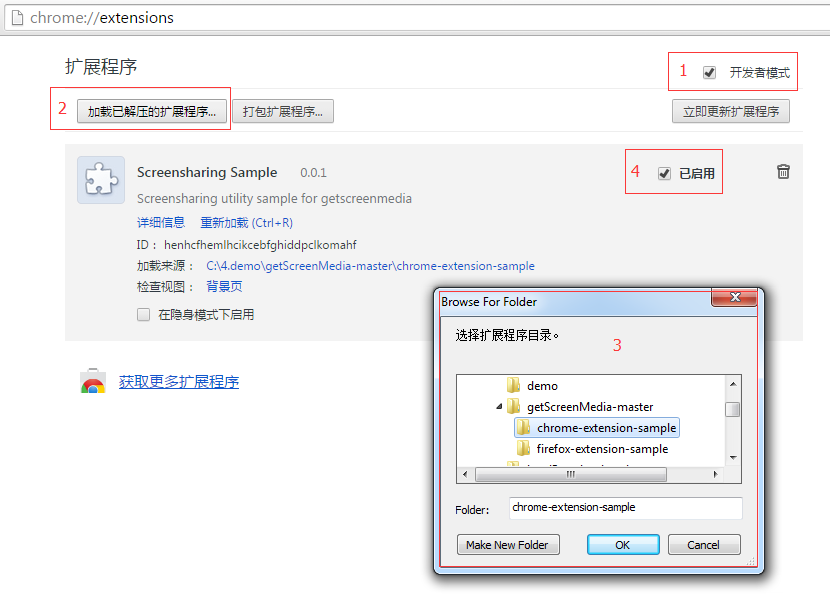
打开chrome,输入 chrome://extensions/ 以打开chrome的扩展程序,按下图的顺序加载:

2 共享桌面
共享桌面方法:
webrtc.shareScreen()
停止共享桌面方法:
webrtc.stopScreenShare()
![]()
//// 桌面共享
var button =
document.getElementById('screenShareButton'),
setButton =
function (bool) {
//button.innerText = bool ? 'share screen' : 'stop sharing';
$('#screenShareButton').attr('value', bool ? 'Share Screen' : 'Stop Sharing');
};
setButton(
true);
function screenShare() {
if (webrtc.getLocalScreen()) {
webrtc.stopScreenShare();
setButton(
true);
}
else {
webrtc.shareScreen(
function (err) {
if (err) {
setButton(
true);
}
else {
setButton(
false);
}
});
}
}
.
3 本机显示共享的内容
本机显示:
![]()
// local screen obtained
webrtc.on('localScreenAdded',
function (video) {
//video.onclick = function () {
// video.style.width = video.videoWidth + 'px';
// video.style.height = video.videoHeight + 'px';
//};
video.className = 'localVideo';
document.getElementById('localScreenContainer').appendChild(video);
$('#localScreenContainer').show();
});
个人觉得本机没必要,在点击时放大共享的内容,所以把上面click事件注释掉了。
移除显示:
![]()
// local screen removed
webrtc.on('localScreenRemoved',
function (video) {
document.getElementById('localScreenContainer').removeChild(video);
$('#localScreenContainer').hide();
});
.
4 接收桌面共享
接收桌面共享:
![]()
// a peer video has been added
webrtc.on('videoAdded',
function (video, peer) {
console.log('video added', peer);
var remotes =
document.getElementById('remotes');
if (remotes) {
var container =
document.createElement('div');
//container.className = 'videoContainer';
container.id = 'container_' + webrtc.getDomId(peer);
container.appendChild(video);
// suppress contextmenu
video.oncontextmenu =
function () {
return false; };
video.className = 'remoteVideos';
// resize the video on click
video.onclick =
function () {
launchFullscreen(video);
};
// show the ice connection state
if (peer && peer.pc) {
var connstate =
document.createElement('div');
connstate.className = 'connectionstate';
container.appendChild(connstate);
peer.pc.on('iceConnectionStateChange',
function (event) {
switch (peer.pc.iceConnectionState) {
case 'checking':
//connstate.innerText = 'Connecting to peer...';
break;
case 'connected':
case 'completed':
// on caller side
//$(vol).show();
//connstate.innerText = 'Connection established.';
break;
case 'disconnected':
//connstate.innerText = 'Disconnected.';
break;
case 'failed':
//connstate.innerText = 'Connection failed.';
break;
case '
closed':
//connstate.innerText = 'Connection closed.';
break;
}
});
}
remotes.appendChild(container);
}
});
其中remotes是一个div,用于放共享桌面和对方视频;当点击小共享桌面图时,最大化:
function launchFullscreen(element) {
if (element.requestFullscreen) {
element.requestFullscreen();
} else if (element.mozRequestFullScreen) {
element.mozRequestFullScreen();
} else if (element.msRequestFullscreen) {
element.msRequestFullscreen();
} else if (element.webkitRequestFullscreen) {
element.webkitRequestFullScreen();
}
}
同样地,当对方停止共享时,要移除显示:
![]()
// a peer was removed
webrtc.on('videoRemoved',
function (video, peer) {
console.log('video removed ', peer);
var remotes =
document.getElementById('remotes');
var el =
document.getElementById(peer ? 'container_' + webrtc.getDomId(peer) : 'localScreenContainer');
if (remotes && el) {
remotes.removeChild(el);
}
});
5 调试
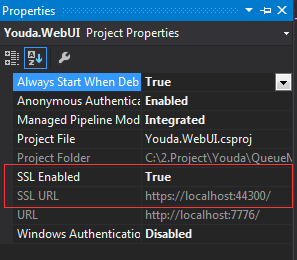
选中web项目,按F4打开属性面板:

修改SSL Enabled为 True,然后它会自己为你的项目生成一个SSL URL,这时你就可以用https来测试桌面共享了:
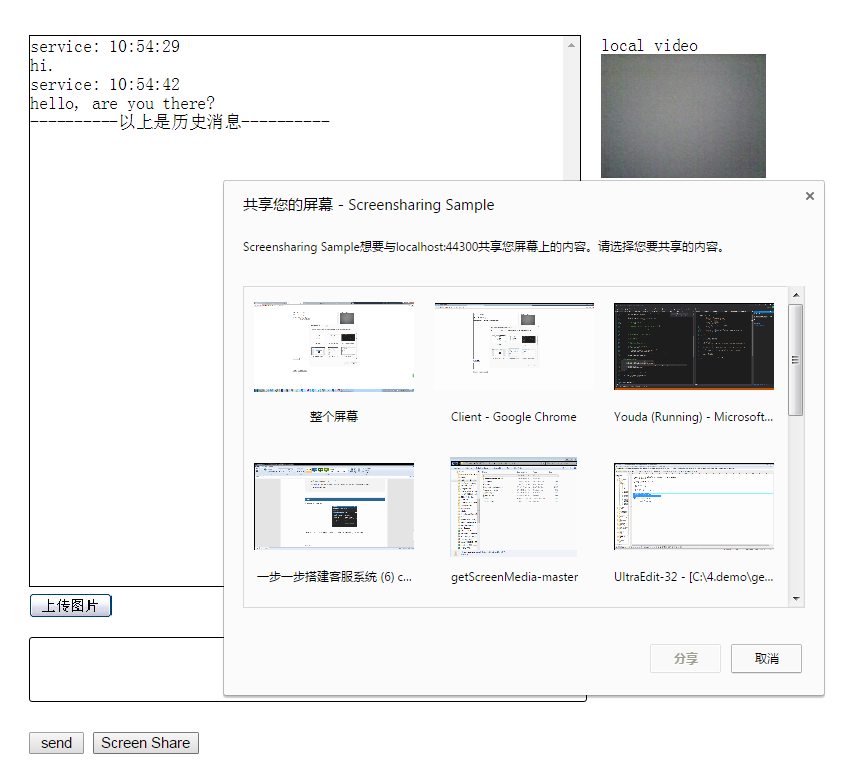
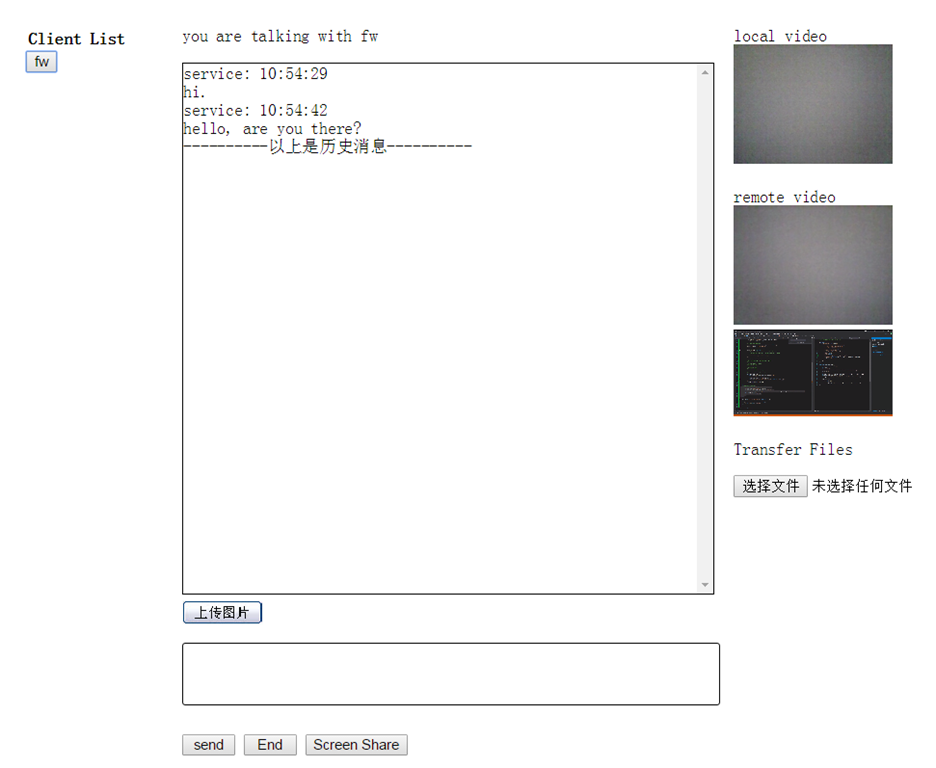
点击共享按钮,弹出共享对话框,这可以选择共享整个屏幕还是单个程序:

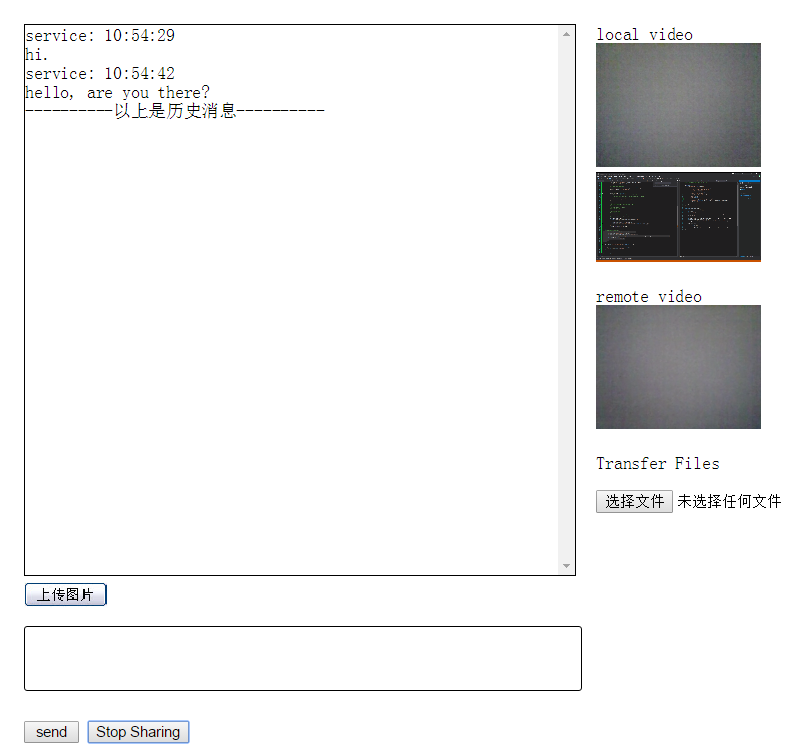
选中一个共享内容,本机local video 下显示了一个小图:

再看对方,remote video下 也显示了一个小图:

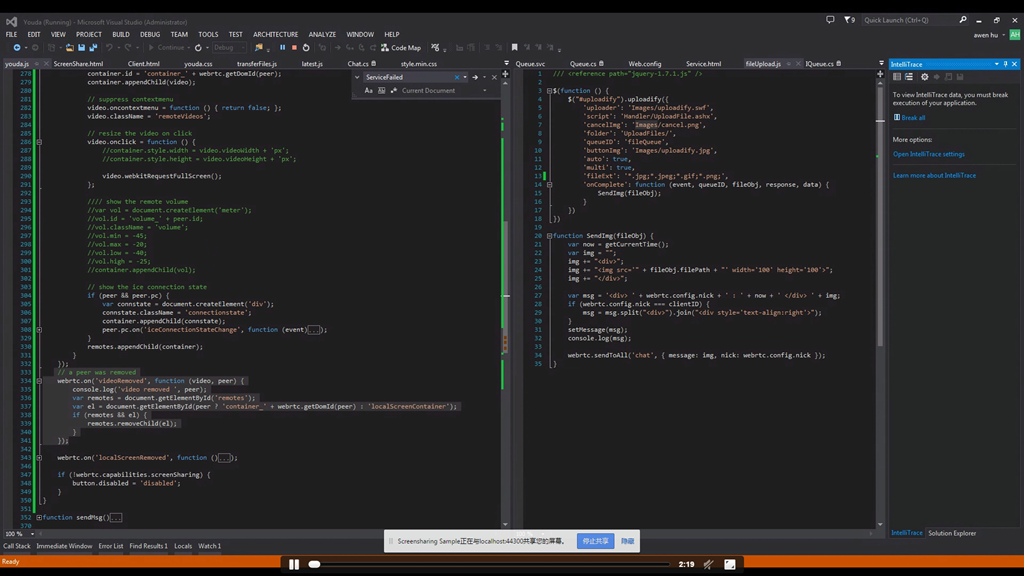
点击这个remote的小图,即可全屏显示对方的桌面共享:

6 发布
6.1 修改 manifest.json 文件,把localhsot修改成服务器上的域名
"content_scripts": [ {
"js": [ "content.js" ],
"matches": [ https://www.gwjg.com:*/* ]
}],
6.2 添加SSL证书
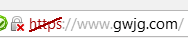
因为必须使用https, 一打开就会显示下面的红叉叉:

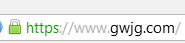
装了证书后,就会显示正常:

申请SSL证书:
https://buy.wosign.com/free/freessl.html?lan=cn#ssl
在上面网站申请成功并下载证书。解压并把 ‘for iis’目录下的pfx文件复制到服务器上。
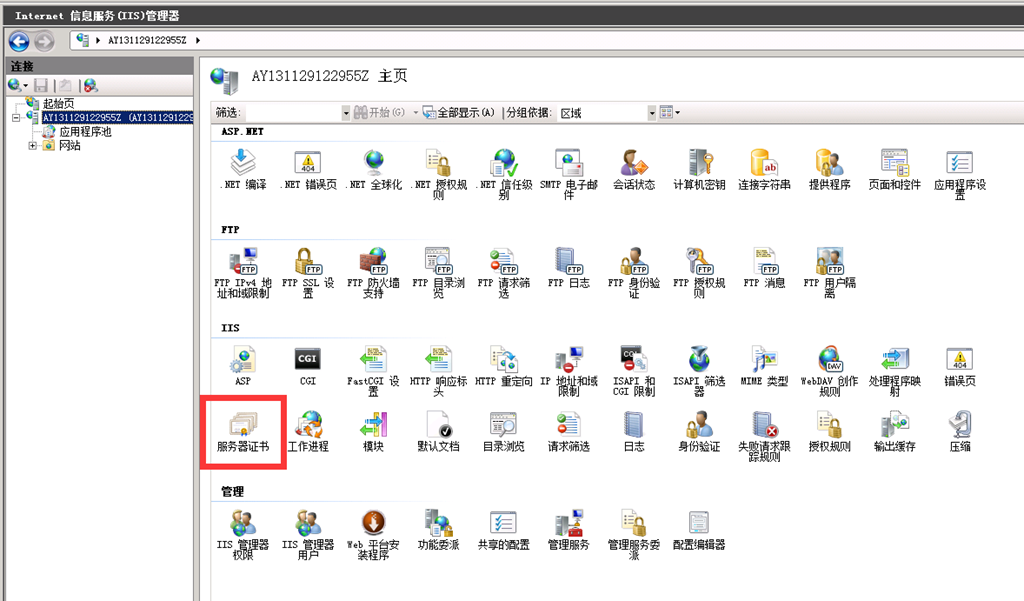
打开iis里的服务器证书:

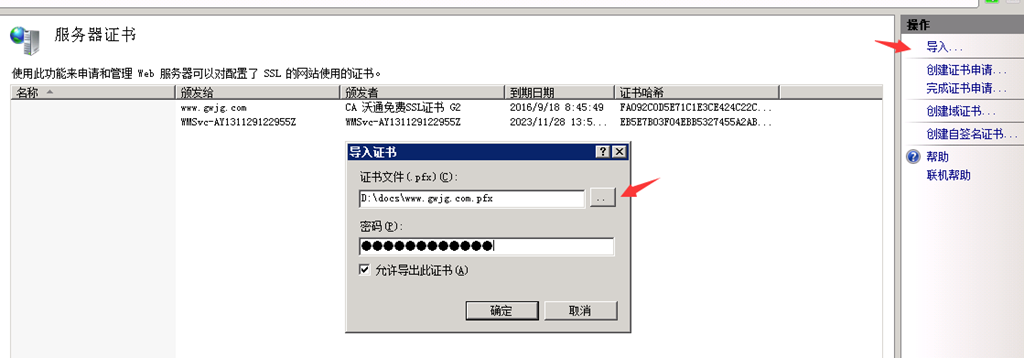
导入证书:

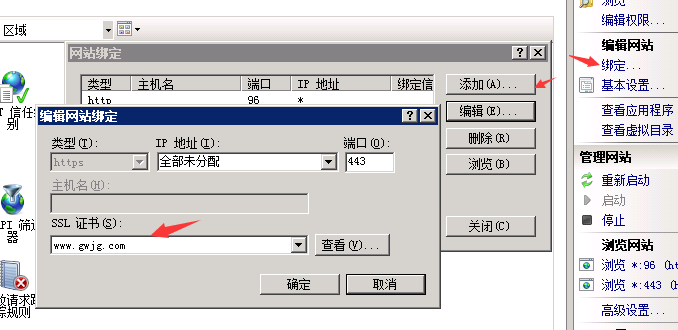
把网站绑定上证书:

.